What Is GitHub?
A free service for storing and sharing Git-managed code online. Use it for backups, collaboration, and showcasing your projects.
Prerequisite: Install Git
GitHub requires Git on your computer. If you haven't installed it yet, see "How to Install Git."
Create an Account
Go to github.com
Open github.com and click Sign up.

Enter your account details
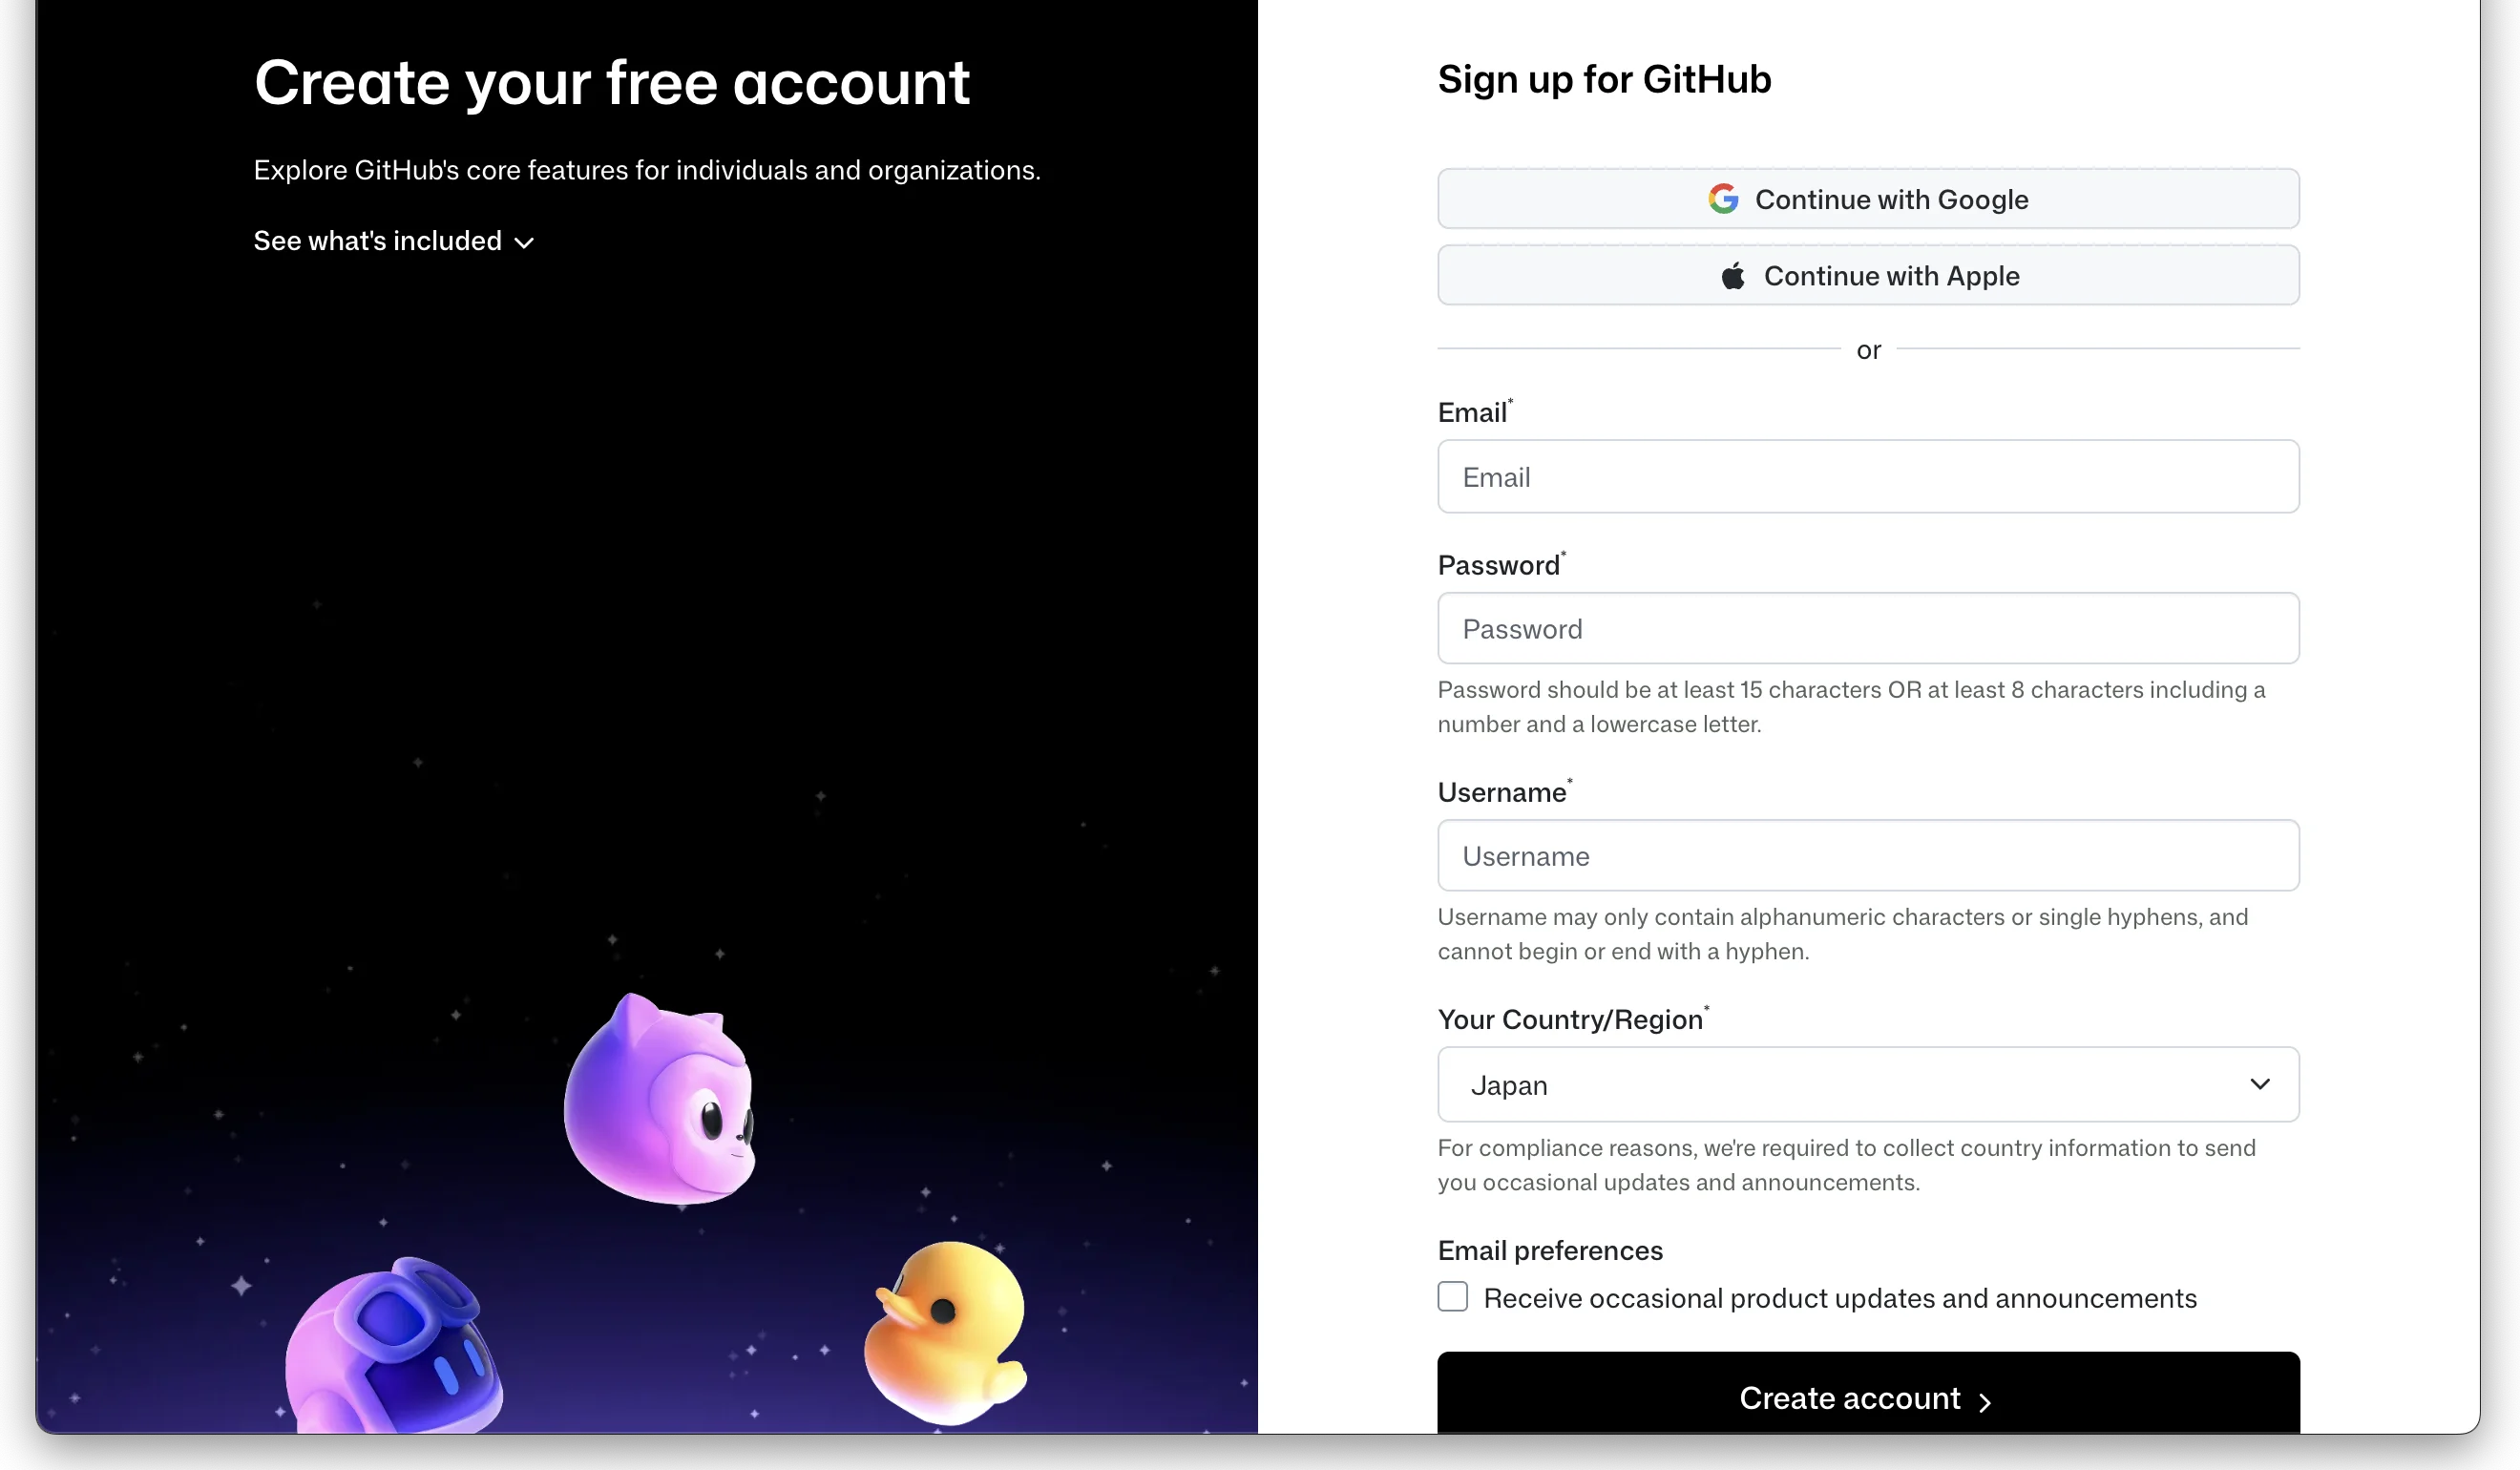
- Email: Enter your email address
- Password: Choose a password (at least 15 characters, or at least 8 with a number and lowercase letter)
- Username: Pick a username
Choose a username
Your username is part of your profile URL (github.com/your-username). You can change it later.
Username rules
- Only alphanumeric characters and hyphens (
-) are allowed - Cannot begin or end with a hyphen
- Must be unique across GitHub
Verify your email
Click "Create account" and enter the verification code sent to your email.
Complete initial setup (optional)
You can click "Skip personalization" to skip the onboarding questions.
Explore the GitHub Interface
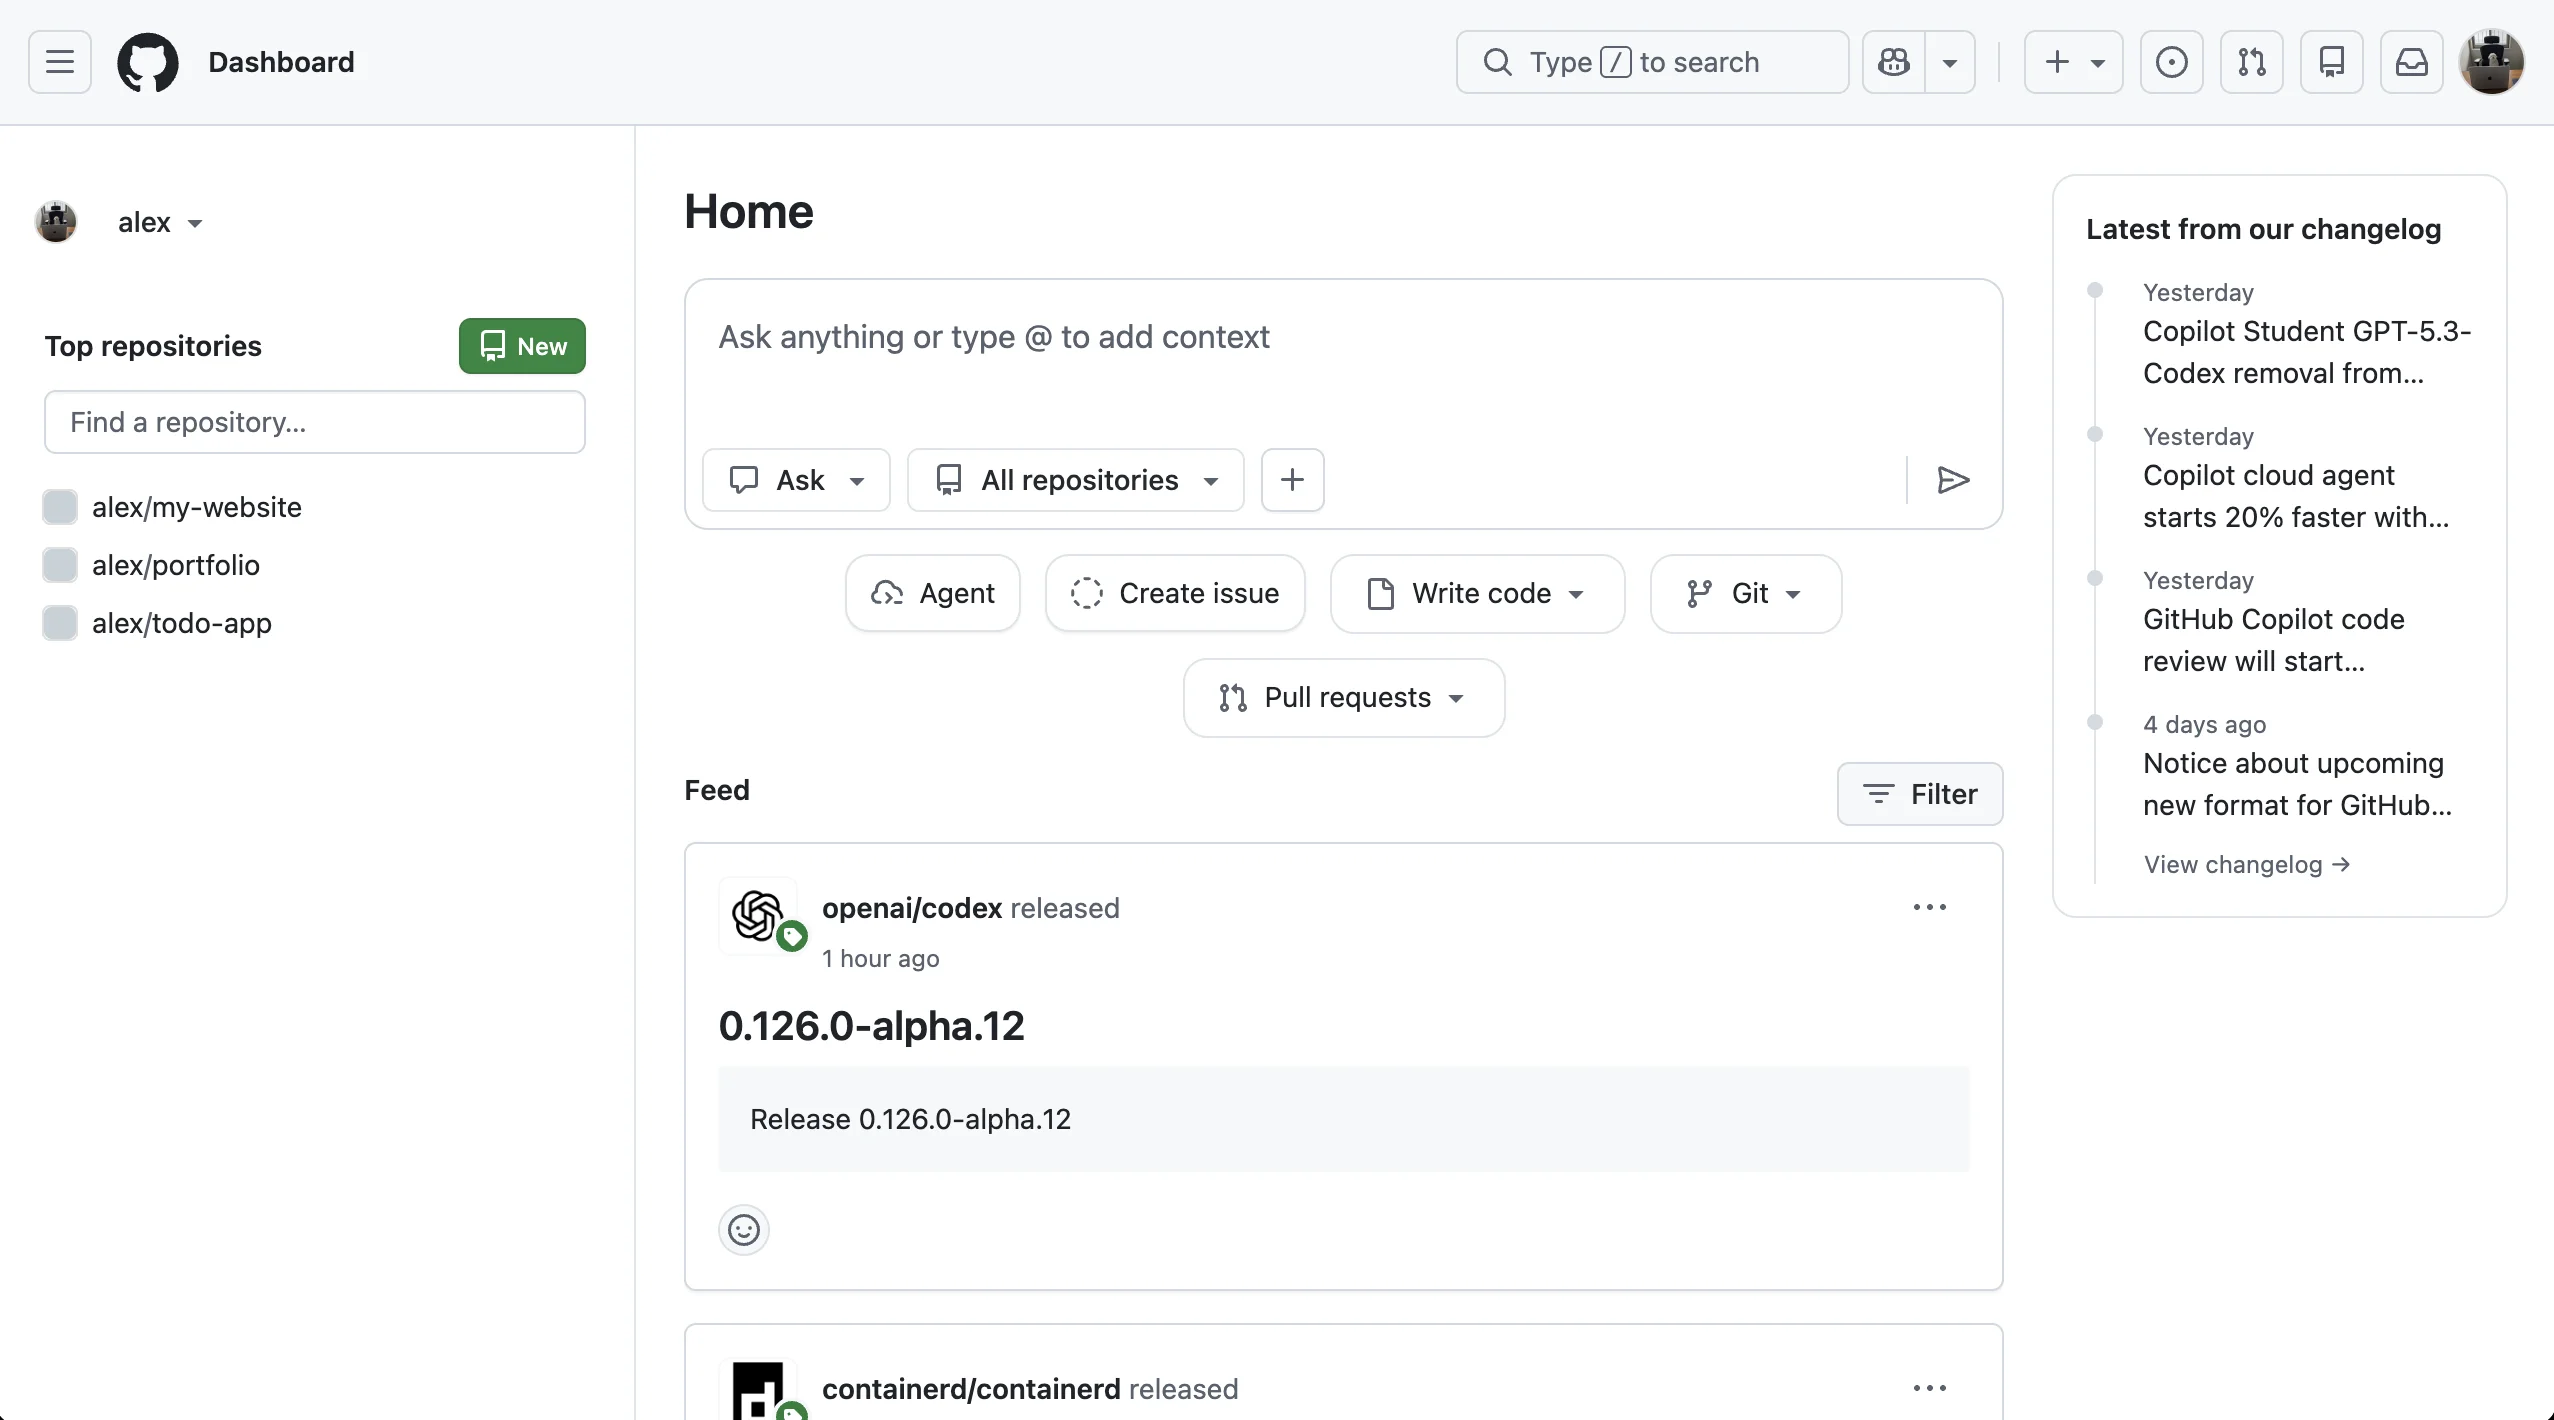
Dashboard
Your home screen after logging in. It shows your repositories and updates from repos you follow.
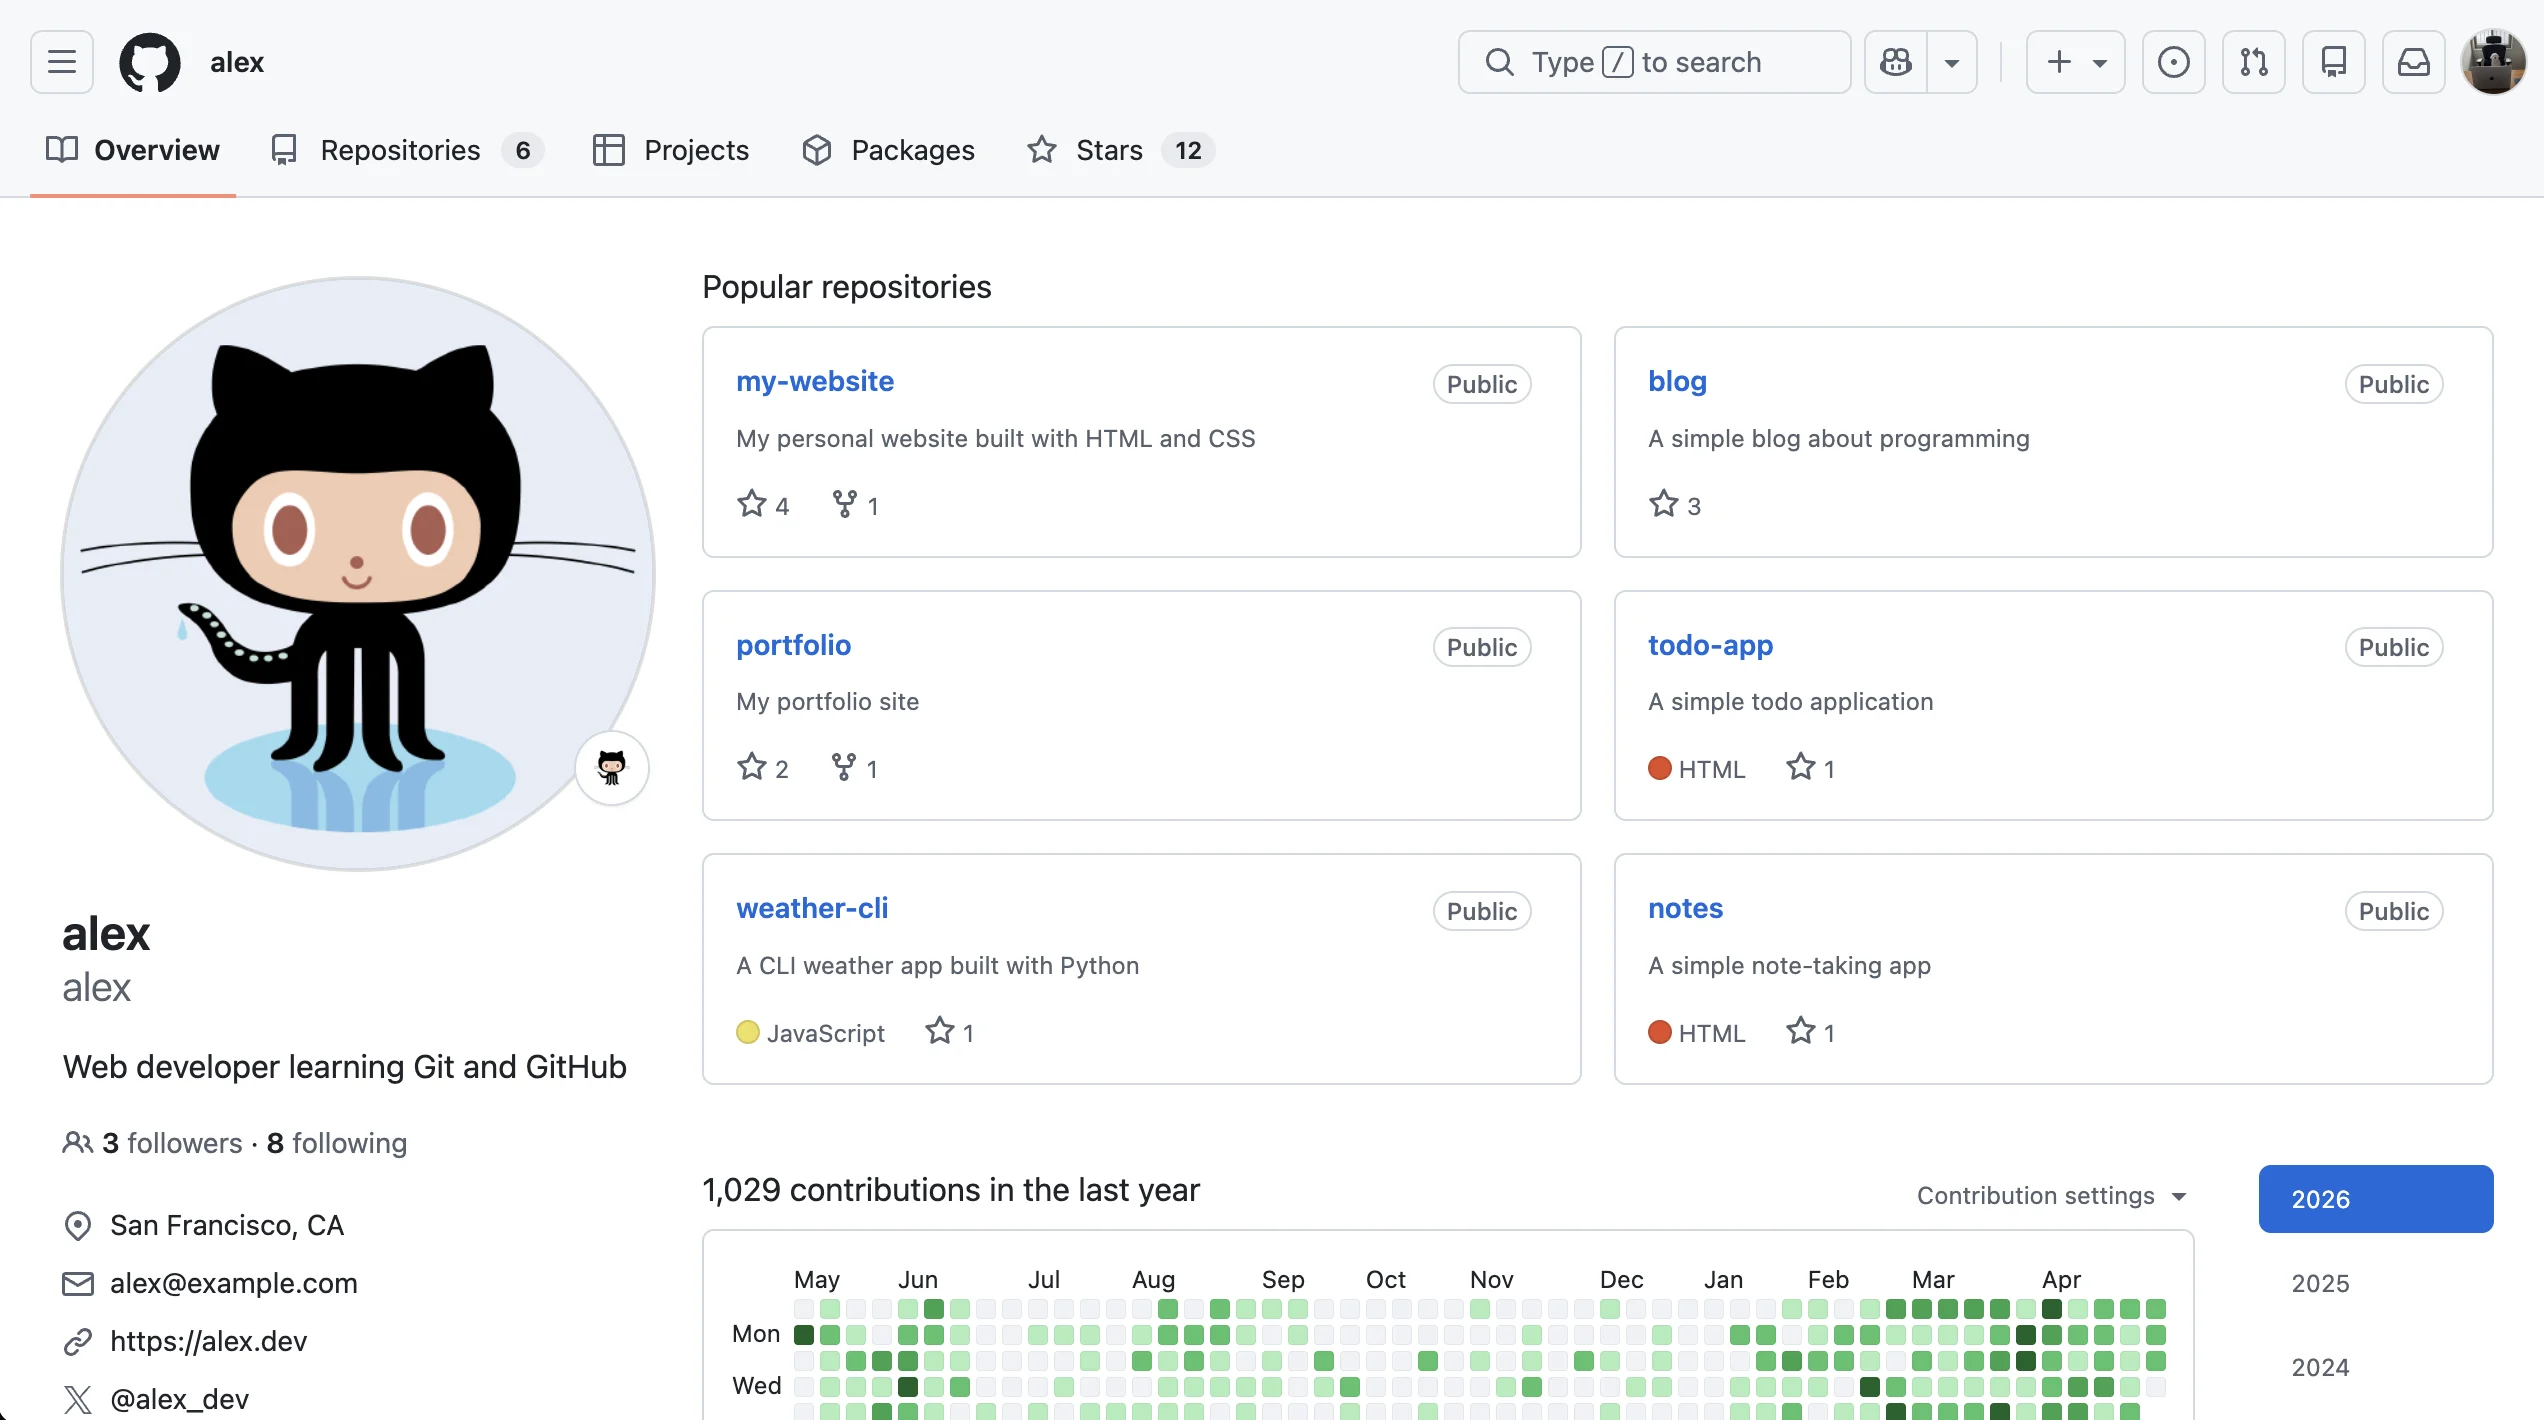
Profile Page
Click your avatar → Your profile to see your public repositories and contribution activity.
Create a Repository
Creating a repository on GitHub lets you connect it with a Git repository on your local machine.
Open the new repository page
Click "+" → "New repository" in the top-right corner.
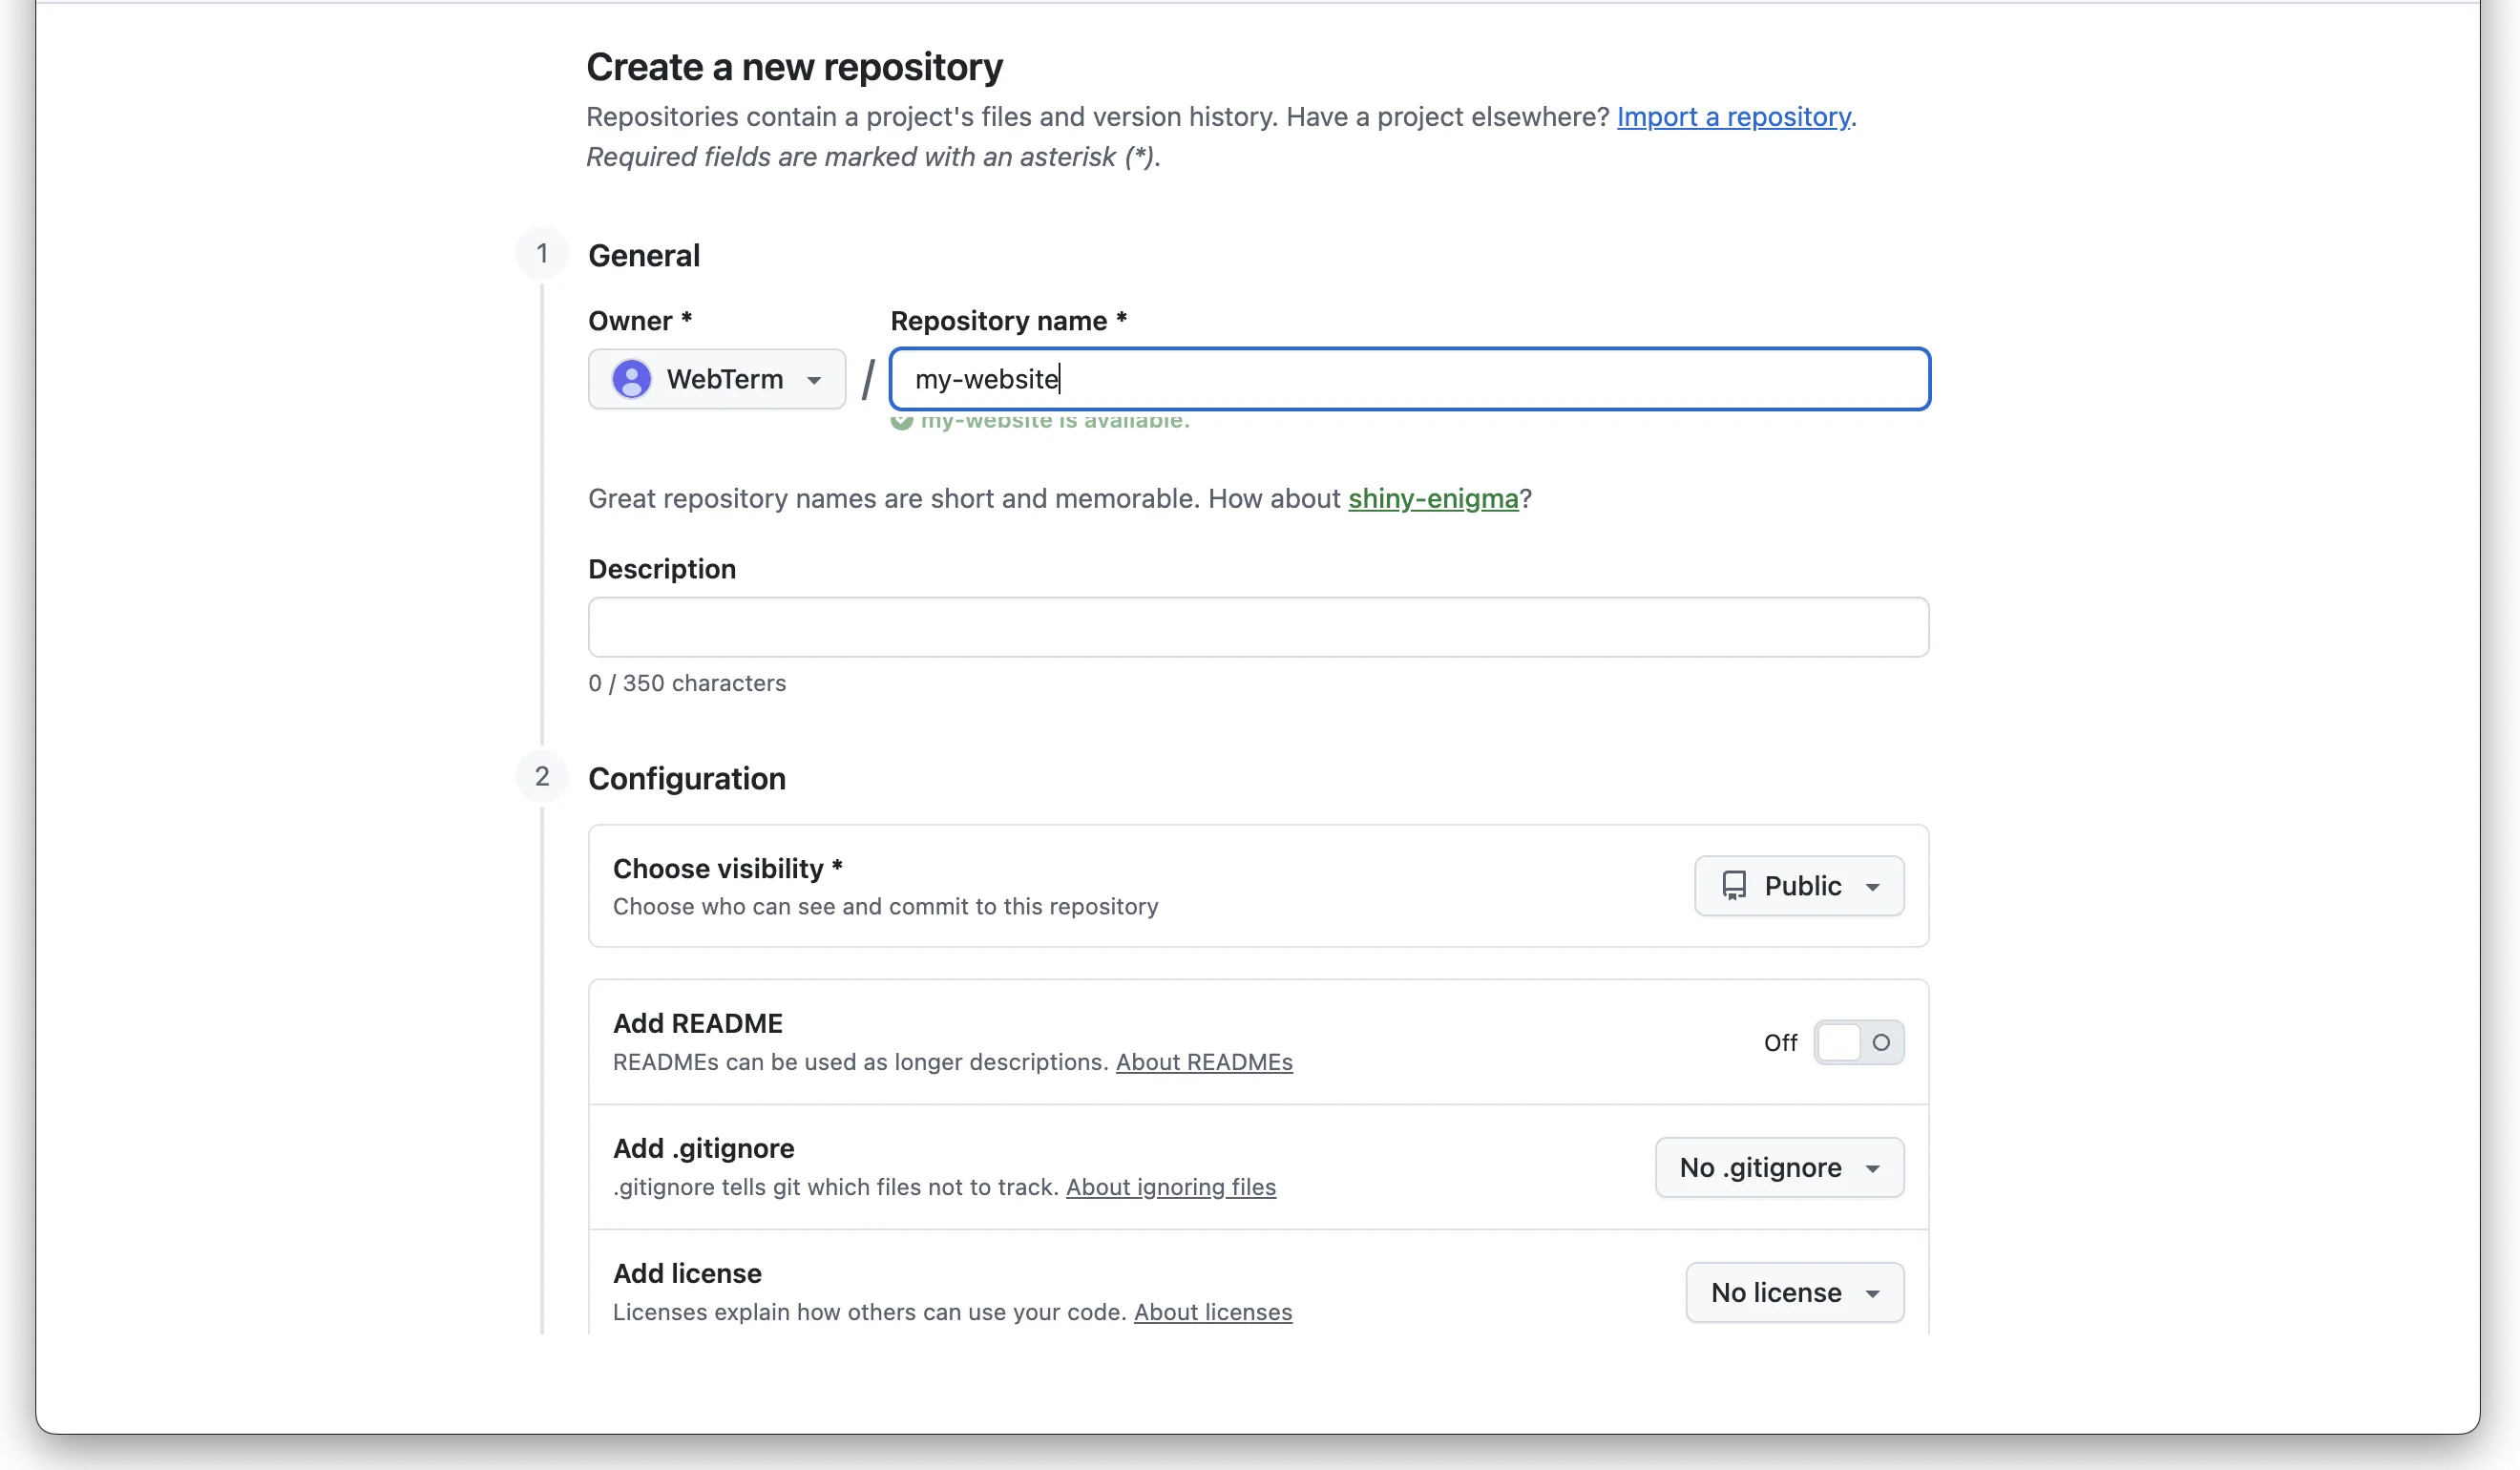
Enter a repository name
Type a name in the "Repository name" field (e.g., my-website, todo-app).
Naming conventions
- Use lowercase letters
- Separate words with hyphens (
-) - The "Description" field is optional but useful for a brief summary
Choose visibility
- Public: Anyone can see the repository (for open-source projects and portfolios)
- Private: Only you (and people you invite) can see it
If you're unsure, choose Private. You can change this later.
Configure initial files
If you already have a local Git repository, leave all of these turned off.
- Add README: Leave off
- Add .gitignore: Leave as "No .gitignore"
- Add license: Leave as "No license"
Why leave these off?
Adding files here will cause conflicts when you push from your local repository. Create the repository empty instead.
Create the repository
Click "Create repository."
Find Your Repository URL
Use the URL shown on the setup page to register a remote in your local Git repository:
git remote add origin https://github.com/alex/my-website.gitURL format and "origin"
The URL follows the format https://github.com/your-username/repository-name.git. origin is the conventional name for the primary remote repository.
Public and Private Repositories
- Public: Anyone can view and clone the code. Only the owner and invited collaborators can push
- Private: Only the owner and invited collaborators can access it (free accounts can create unlimited private repos)
| Operation | Public Repository | Private Repository |
|---|---|---|
| View on GitHub | Anyone | Owner and collaborators only |
git clone | No authentication needed | Authentication required |
git pull / git fetch | No authentication needed | Authentication required |
git push | Authentication required | Authentication required |
Notes
Pushing always requires authentication regardless of visibility. You can change a repository's visibility anytime in Settings.
Setting Up Authentication
To push code to GitHub, you need a Personal Access Token (PAT) instead of a password.
Creating a Personal Access Token
Open the token settings page
Avatar → Settings → Developer settings → Personal access tokens → Tokens (classic) → Generate new token (classic)
Configure the token
- Note: A descriptive name (e.g., "My laptop")
- Expiration: Choose a period (90 days is a good start)
- Select scopes: Check
repo
Generate and copy the token
Click Generate token and copy the token immediately.
The token is only shown once. Make sure to copy it now.
Use the token when pushing
When git push asks for credentials, enter your username and paste the token as the password.
Username: your-github-username
Password: (paste your token here)
Save the token so you don't have to enter it every time
Run this command so Git remembers your token after the next time you enter it:
git config --global credential.helper storeMore secure storage options (by OS)
credential.helper store saves the token in plain text. For more secure storage:
- macOS:
git config --global credential.helper osxkeychain - Windows:
git config --global credential.helper manager
Alternative: Using SSH Keys
Instead of a PAT, you can authenticate with SSH keys (a private/public key pair). Once set up, you never need to enter a token.
Setup steps:
- Generate a key pair with
ssh-keygen -t ed25519 - Register the public key (
~/.ssh/id_ed25519.pub) on GitHub under Settings → SSH and GPG keys - Test the connection with
ssh -T git@github.com
Next Steps
You're all set. You can now connect your local Git repository to GitHub and push your code.
git remote add origin https://github.com/your-username/repository-name.git
git push -u origin main
On the first push, Git will prompt for your username and token. If you configured a credential helper, you won't need to enter them again.
In WebTerm Learn's "Git Introduction" course, you can practice these operations hands-on right in your browser.